


A Better Way to Cook
Discover Vapor® Cooking, a modern approach rooted in the time-tested principles of waterless cooking.
Using the natural moisture in your food, Vapor® Cooking helps preserve flavor and nutrients while using less added water and fat.
Healthier, more flavorful meals. Simply cooked.
What Is Vapor® Cooking?
Vapor® Cooking is 360's approach to the time-tested principles of waterless cooking. Instead of covering food with water or relying on high heat, it uses the natural moisture already present in your food to help cook it gently and evenly.
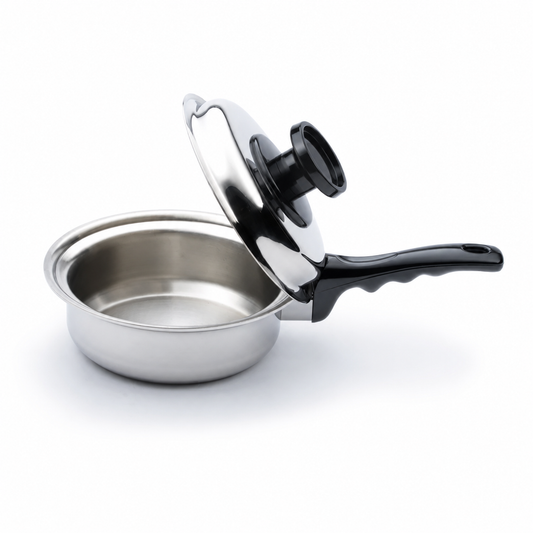
As your food heats, moisture turns to vapor. The specially designed lid helps create a seal that allows that heat and moisture to circulate inside the cookware.
The result is flavorful, nutrient-rich food using less added water and fat — while letting the cookware do more of the work.
It's a modern approach to waterless cooking, made the 360 way.
How to Vapor® Cook Vegetables
STEP 1 — ADD YOUR FOOD
Place your vegetables in the cookware with little to no added water, depending on what you're cooking.
For moisture-rich vegetables, simply rinse them and place them in the pan with the water that naturally clings to them.
For drier vegetables or foods with less natural moisture, you may need to add a small amount of water — about ¼ cup is a good place to start.
STEP 2 — COVER AND START ON MEDIUM HEAT
Place the lid on the cookware and begin cooking over medium heat.
As the food heats, its natural moisture begins to turn to vapor.
STEP 3 — WATCH FOR VAPOR
When you see vapor beginning to escape from around the lid, give the lid a gentle spin.
If it spins freely, your Vapor Seal has formed.
STEP 4 — TURN THE HEAT TO LOW
Once the Vapor Seal forms, reduce the heat to low.
Now let the trapped heat and moisture circulate inside the cookware and continue cooking your food.
STEP 5 — RESIST LIFTING THE LID
Try not to lift the lid while your food is cooking. Every time you open it, heat and moisture escape and the Vapor Seal has to build again.
Let your 360 do the work.
STEP 6 — CHECK FOR DONENESS
When your cooking time is complete, remove the lid and check your food.
If it needs more time, replace the lid, allow the seal to form again, and continue cooking on low.
That's Vapor® Cooking: build the seal, turn it down, and let the cookware do the work.

How to Vapor® Cook Proteins
Proteins cook a little differently than vegetables. For meats like chicken, steak and pork, start with a good sear, then let Vapor® Cooking help finish the job.
STEP 1 — PREHEAT YOUR PAN
Preheat your cookware over medium heat. A properly heated pan helps create a beautiful sear and helps prevent sticking.
STEP 2 — ADD YOUR PROTEIN
Pat your protein dry and place the protein directly into the preheated pan. Depending on what you're cooking, you may use a small amount of oil or cook without added fat.
STEP 3 — LET IT SEAR & RELEASE
Don't try to move or flip the protein right away. Let it develop a good sear. When it's ready, it will begin to release naturally from the stainless steel.
STEP 4 — FLIP & COVER
Flip the protein, place the lid on the pan and allow the natural moisture released during cooking to begin creating the Vapor Seal.
STEP 5 — REDUCE THE HEAT
Once the Vapor Seal forms, reduce the heat to low. The trapped heat and moisture will continue cooking the protein gently and evenly.
STEP 6 — CHECK FOR DONENESS
Check that your protein has reached the appropriate safe internal temperature before serving.
Sear for flavor. Seal in moisture. Finish low and slow.

Taste the Difference
One of the first things you may notice with Vapor® Cooking is simply how good your food tastes.
Vegetables keep more of their natural flavor instead of becoming waterlogged or mushy, while proteins can stay tender, juicy and flavorful.
And you can still use butter, olive oil, herbs and your favorite seasonings. The difference? They become flavor enhancers instead of something you rely on to make bland food taste better.
When you start with food that tastes this good on its own, you don't need to do as much to it.
One pan for the rest of your life
360 Cookware is more than just a purchase; it's a lifelong investment in your culinary journey. Our unconditional lifetime warranty ensures that your cookware will be a faithful kitchen companion for generations to come.


The set is solidly constructed and works wonderfully on our induction cooktop. "The set is solidly constructed and works wonderfully on our induction cooktop."


I am in love with these pans! They are one of the best purchases we have made - the quality is impeccable! "I am in love with these pans! They are one of the best purchases we have made - the quality is impeccable!"
If used properly these pans work wonderfully. Made in USA, healthier to use than other types of materials, easy cleaning. Never wear out. What's not to like? "If used properly these pans work wonderfully. Made in USA, healthier to use than other types of materials, easy cleaning. Never wear out. What's not to like?"


Product Finder
Discover kitchen essentials that inspire culinary creativity and elevate your cooking experience.